
Overview of the Yamaha MG12XU Mixer Manual
The Yamaha MG12XU mixer manual provides comprehensive guidance on features, installation, and operation. It covers input channels, effects, and troubleshooting, ensuring optimal performance for various audio applications.
The Yamaha MG12XU mixer manual is a detailed guide designed to help users understand and operate the mixer effectively. It provides an overview of the mixer’s features, installation steps, and operational procedures. Available for free download, the manual is accessible on Yamaha’s official website, ensuring users have the latest specifications and updates. It serves as a comprehensive resource for both beginners and professionals, covering everything from basic setup to advanced audio processing techniques. The manual is essential for unlocking the full potential of the MG12XU mixer.
1.2 Importance of Reading the Manual
Reading the Yamaha MG12XU mixer manual is crucial for understanding its features and proper operation. It helps users avoid setup mistakes and ensures optimal performance. The manual provides detailed instructions for installation, troubleshooting, and maintaining the mixer. By following the guidelines, users can maximize the mixer’s capabilities and resolve common issues efficiently. Accessible online, the manual is a vital resource for both beginners and professionals, offering clear guidance to enhance audio quality and overall mixing experience.

Features of the Yamaha MG12XU Mixer
The Yamaha MG12XU mixer offers 12 channels, 6 microphone inputs, and 4 stereo line inputs. It includes built-in effects, EQ controls, and auxiliary sends, providing versatile mixing capabilities.
2.1 Input Channels and Configurations
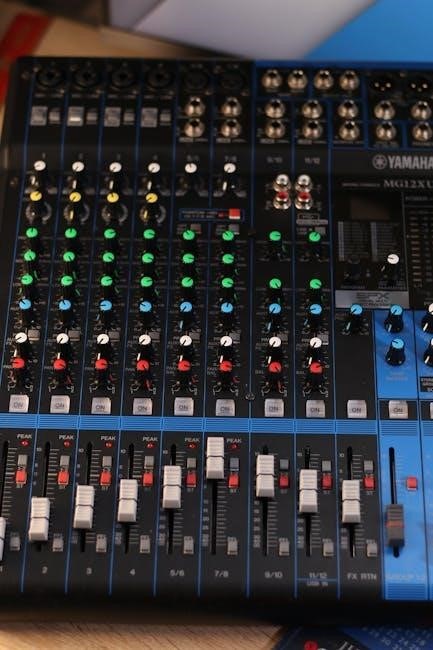
The Yamaha MG12XU features 12 input channels, with 6 dedicated for microphones and 4 for stereo line inputs. This configuration allows flexibility for live performances and studio recordings. Each channel includes a combo jack for XLR or TRS connections, enabling compatibility with various microphones and audio devices. The mixer supports up to 24-bit/192kHz resolution, ensuring high-quality audio capture. This versatility makes it suitable for a wide range of applications, from small gigs to professional setups.
2.2 Built-In Effects and Processing
The Yamaha MG12XU features 24 built-in effects, including reverb, delay, and chorus, to enhance audio quality. These effects are easily accessible via a dedicated button and can be adjusted to suit various mixing needs. The mixer also includes D-PRE preamps, known for their clear and natural sound reproduction. Additionally, the 1-knob compressors simplify dynamic control, ensuring consistent audio levels. These built-in processing tools empower users to achieve professional-grade sound without external gear, making the MG12XU a versatile and powerful mixing solution.

Installation and Setup
Unpack and install the mixer on a stable surface. Connect devices and cables as per the manual. Ensure proper power supply and configuration for optimal performance.
3.1 Unpacking and Physical Installation
Begin by carefully unpacking the Yamaha MG12XU mixer, ensuring all components are included and undamaged. Place the mixer on a stable, flat surface, away from direct sunlight. Connect the power cord securely, ensuring proper ventilation to prevent overheating. Install any additional accessories like rack mounts if needed. Follow the manual’s guidelines for positioning to maintain optimal performance and avoid damage. Refer to the user manual for detailed unpacking and installation instructions to ensure a safe and proper setup. This step is crucial for long-term functionality and reliability.
3.2 Connecting Devices and Cables
Connect your microphones and instruments to the mixer’s input channels using XLR or TRS cables. Line-level devices can be connected via TRS or RCA inputs. Ensure all cables are securely plugged in to avoid signal loss. Use the correct cable types to match your devices’ outputs. Avoid overloading inputs by adjusting levels properly. For external effects or auxiliary sends, connect cables to the appropriate Aux or Effects sends/returns. Organize cables neatly to prevent tangling and ensure reliable connections. Always power on devices in the correct sequence to avoid damage or noise. Refer to the manual for specific connection diagrams and guidelines to ensure proper setup and optimal performance.
Basic Operation Guide
The Yamaha MG12XU mixer offers an intuitive interface for adjusting levels, EQ, and effects. Use faders and knobs to fine-tune audio, ensuring balanced and clear sound output.
4.1 Adjusting Levels and EQ
Adjusting levels and EQ on the Yamaha MG12XU ensures optimal audio balance. Use the channel faders to set input levels, and the EQ knobs to fine-tune frequencies. The high, mid, and low bands allow precise tone shaping. For clear sound, set the gain levels appropriately and use the peak lights to avoid distortion. Experiment with EQ settings to enhance vocals or instruments, ensuring a polished mix. Refer to the manual for detailed guidance on mastering these adjustments.
4.2 Using the Effects and Auxiliary Sends
The Yamaha MG12XU features built-in effects like reverb and delay to enhance your mix. Use the auxiliary sends to route signals to external processors or the internal effects. Assign each channel to an auxiliary send, adjust the send level, and select the desired effect. The auxiliary returns allow blending processed signals back into the mix. Experiment with effect levels to create depth without overpowering the main audio. This section helps you master advanced audio processing for professional results.
Technical Specifications
The Yamaha MG12XU features 12 input channels, 6 mono microphone inputs with phantom power, and 3-band EQ. It supports USB connectivity for digital audio transfer and weighs 4.5 kg.
5.1 General Specifications
The Yamaha MG12XU mixer features 12 channels with 6 mono and 6 stereo inputs, 4-group buses, and a built-in USB interface. It weighs 4.5 kg (9.9 lbs) and measures 308mm (12.1″) wide, 118mm (4.6″) tall, and 297mm (11.7″) deep. The mixer consumes 25W of power and operates on 100-240V AC. It includes a rugged metal chassis and durable construction, ensuring reliability in professional and live sound environments. The MG12XU is designed for versatility and durability, meeting the demands of various audio applications.
5.2 Microphone and Line Input Specifications
The Yamaha MG12XU features 6 microphone inputs with XLR connectors and 12 line-level inputs, including 4 stereo channels. Microphone inputs offer a sensitivity range of -60dB to -20dB and an impedance of 150 ohms. Line inputs provide a maximum input level of +20dB and an impedance of 600 ohms. The mixer supports a wide range of audio sources, ensuring high-quality sound reproduction; These specifications cater to both live and studio environments, providing flexibility and reliability for professional use.
Troubleshooting Common Issues
The manual addresses common problems like connection issues, audio distortion, and low output. It provides step-by-step solutions to ensure smooth operation and optimal sound quality.
6.1 Identifying and Solving Connection Problems
The manual guides users in diagnosing connection issues, such as loose cables or incorrect jack usage. It advises checking power supply, input levels, and cable integrity. Detailed steps help resolve problems like no audio output or distorted sound. Additionally, it recommends verifying mixer settings and device compatibility. Troubleshooting charts and diagrams are provided for quick identification of common issues, ensuring seamless audio performance. Visit the Yamaha support page for additional resources.
6.2 Resolving Audio Quality Issues
The manual offers solutions for common audio quality problems, such as distortion or low volume. It suggests adjusting input levels, checking EQ settings, and ensuring proper Gain staging. Additionally, it recommends using the built-in effects judiciously to avoid overprocessing. For issues like hum or noise, the manual advises verifying cable quality and grounding. Detailed troubleshooting steps and diagrams help users identify and fix issues efficiently, ensuring clear and professional audio output. Refer to the manual for step-by-step guidance on optimizing sound quality.
Maintenance and Care
Regularly clean the mixer to prevent dust buildup and ensure proper functionality. Store it in a dry, cool place, away from direct sunlight and moisture. Use a soft cloth for cleaning to avoid scratching the surface. Proper care extends the mixer’s lifespan and maintains its performance quality. Follow the manual’s guidelines for storage and maintenance.
7.1 Cleaning the Mixer
To maintain the Yamaha MG12XU mixer’s performance and appearance, clean it regularly with a soft, dry cloth. Avoid using harsh chemicals or liquids, as they may damage the finish or harm internal components. Gently wipe down the control surface, knobs, and connectors to remove dust and dirt. For stubborn stains, lightly dampen the cloth with water, but ensure it is thoroughly dry before applying to the mixer. Proper cleaning prevents malfunctions and ensures long-term reliability. Avoid exposing the mixer to direct sunlight or moisture during cleaning.
7.2 Storing the Mixer Properly
Store the Yamaha MG12XU mixer in a cool, dry place, away from direct sunlight and moisture. Use the original packaging or a sturdy, protective case to prevent damage. Avoid extreme temperatures and humidity, as these can harm the internal components. Ensure the mixer is powered off before storage. When not in use for extended periods, disconnect all cables and devices. Regularly inspect the mixer for dust or damage before and after storage. Proper storage ensures longevity and maintains the mixer’s performance and appearance.

Software Integration
The Yamaha MG12XU integrates seamlessly with software like Cubase AI, downloadable from Yamaha’s website, offering enhanced recording and production capabilities within digital audio workstations (DAWs).
8.1 Cubase AI Download and Installation
The Yamaha MG12XU manual provides detailed instructions for downloading and installing Cubase AI, a professional DAW. Users can access the software directly from Yamaha’s official website, ensuring compatibility and ease of setup.
Follow the manual’s step-by-step guide to install Cubase AI, enabling seamless integration with the mixer for high-quality music production and recording. Proper installation ensures optimal performance and functionality.
8.2 Using the Mixer with DAWs
The Yamaha MG12XU mixer seamlessly integrates with popular DAWs like Cubase AI, offering professional-grade recording and editing capabilities. Connect the mixer via USB to your computer for direct audio transfer and synchronization.
For optimal use, ensure the mixer is selected as the audio interface in your DAW settings. This setup allows for precise control over tracks, effects, and levels, enabling high-quality sound production and editing.
The Yamaha MG12XU mixer manual guides users through setup, operation, and troubleshooting, ensuring optimal performance. Explore additional resources for enhanced functionality and professional audio production.
9.1 Final Tips for Optimal Use
- Regularly update firmware for enhanced performance.
- Organize cables to prevent signal interference.
- Set gain stages carefully to avoid distortion.
- Use EQ sparingly to maintain natural sound quality.
- Apply effects judiciously for desired sonic outcomes.
- Monitor power levels to prevent overheating.
- Explore Cubase AI for advanced recording capabilities.
These practices ensure the Yamaha MG12XU performs at its best.
9.2 Accessing Additional Resources
For further assistance, visit the official Yamaha website to download the latest manuals, firmware, and software. Explore community forums and Yamaha’s support page for troubleshooting and tips. Utilize video tutorials and FAQs for in-depth guidance. Ensure you’re using the most up-to-date resources to maximize your mixer’s potential and resolve any issues efficiently.